Cleaning Wood with Pressure Washer
A pressure washer is a super tool for cleaning surfaces that has tough stains or are otherwise difficult to clean or wash. A really important object that the pressure washer can clean is wood, no matter if it’s your deck wood or fence wood or any other material made out of expensive wood like chairs, etc. However, do not underestimate the power of a pressure washer because, with one mistake, you can ruin the wood fibers with Max. Water and possibly etch it. Surely, you don’t want to do that to your precious wood. So, this article will help you master the skill of washing and cleaning wood, read on and increase your knowledge.
Things You Need To Clean Wood
Some additional things besides a pressure washer will be necessary for this process.
- Sheets of plastic
- Deck brightener or stripper
- Orbit sander
- Rotating or a fan tip for the pressure washer
- Sandpaper
- Gloves
- Safety goggles
Besides fan tip/ rotating tip, all the things are optional, but if you happen to use them, you will get optimal cleaning results.
**Steps for Cleaning The Wood With A Pressure Washer **
Following are some significant steps; read them carefully, and you get the hang of the process in no time.
**Step 1 **
The first and the foremost important step is to adjust the pressure of a pressure washer. You should find the lowest pressure but make sure that it is still effective even being low. Softer woods like pine or cedar could bear a 500-600 psi pressure, but even hardwoods do not increase the pressure by more than 1200 pounds per square inch.
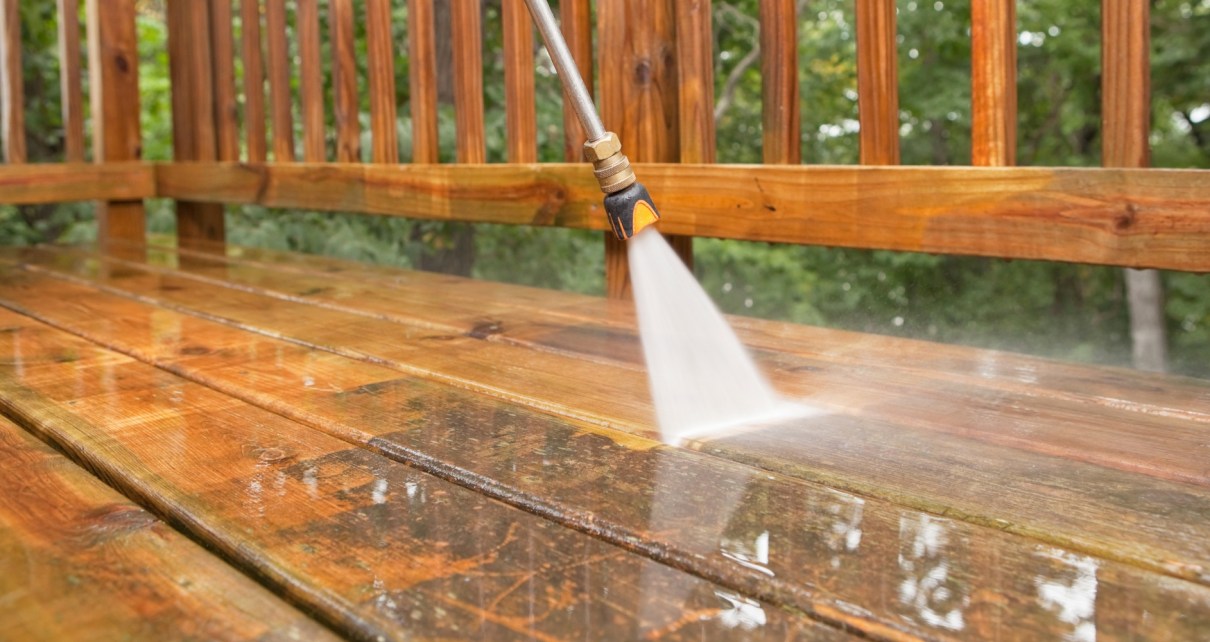
Now that the pressure is all set, wisely choose a spray tip to attach to the nose of the pressure washer. A rotating tip could be a good option if you can handle it carefully, or the second-best option could be a fan tip with a 40-60 degree spread.
It’s common not to get the pressure right on the first attempt so you can test it out on a spearwood object or an easily replaceable one.
**Step 2 **
Now it’s time to wash the real wood once everything is settled. While cleaning, do not take the tip too close and always maintain a distance of at least 6-inches between the wood surface and the washer tip. To get a more consistent cleaning, clean the surface using a sweeping gesture. Keep your arm moving back and forth to not stop too long at one place. This will minimize the chances of wood getting damaged.
**Step 3 **
If your wood is more damaged or ruined by mildew, dark spots, or stains, use a cleaning solution that contains sodium hydroxide. This is not harmful to the wood and helps brighten it but make sure to use it as per the directions written on the package.
If you have any plants nearby, make sure to carefully cover them with plastic sheets as these chemicals can be extremely harmful to them.
**Step 4 **
When the wood gets dry, sand some of the remaining spots. But if you want to reseal the wood, let it dry and then sand the whole surface but make sure to use the right sandpaper. It should not be more than 100 grit sandpaper. This will give you the finest results, and your wood will be as new as ever.
The Takeaway
Cleaning or scrubbing the wood can be much more troublesome than with a pressure washer which gives you a wide range of options at every step possible to suit your needs. So, what are you waiting for? Unleash your cleaning power on your deck or fence today and get it shining.